iPhone Professional Photography 101 – Instagram is a wildly popular social media platform. Based on its active monthly users, we’re willing to bet you are familiar with it and most likely an active user yourself. With over 1 billion active users monthly (130 million of those in the United States alone), Instagram has a worldwide reach. As a business owner, there is a high probability that your target market is already on Instagram.
So, how do you get your audience to stop the scroll on your content? The answer is simple in theory. You must stand out in the overload of visual stimulation. The execution is a little trickier. Today we’re going to focus on making your still photography stand out.
Photography Tips 101
We get it. You’re running a business. You’re likely pulled in a million different directions as it is. Who has time to become an expert in photography? And, not to mention, professional photography gear is expensive. Thankfully, these days, smartphone technology has come a long way. With a little practice, you have everything you need to create visually stunning images right in the palm of your hand. Let’s take a look at a handful of best photography practices and how to accomplish them using your iPhone.
Lighting for Photography
Depending on your brand’s aesthetic, it’s imperative to choose the proper lighting source. We can guarantee that source is almost never your iPhone’s built-in flash. There are a few reasons we hold steadfast to this belief. First, your iPhone’s flash is simply not strong enough to evenly light a scene. Second, the flash tends to cast harsh and distracting shadows. While shadows can be an artistic choice, you have almost no control over the built in flash of your iPhone. And, finally, the light from your iPhone’s flash is bounced back to you off of any reflective surface. Think: mirrors, windows, countertops, etc.
If you do not already own (and know how to use) professional lighting equipment, you can experiment with natural light sources. Did you know that shooting in a garage with the door wide open is touted as one of the easiest, most even natural light sources to work with? So long as the sun is not shining directly into the garage, you have a beautifully diffused light source free of charge! This principle can be carried over to other physical areas of your home or business. How about placing your subject in front of an open door where just the right amount of light shines in? Or, perhaps you have space to stage your scene in front of a large window. In any of these cases, the subject faces the light source, and you place yourself between them to shoot. Just watch out for any shadows you may be casting on the subject.
Photography Exposure
Great lighting leads directly into the topic of proper exposure. Exposure is everything! When photographing a subject, an image that is either over exposed or under exposed causes a loss of detail in the highlights or shadows respectively. In the case of product photography, it’s of the utmost importance to depict your goods as accurately as possible to avoid disgruntled customers and decrease returns.
So, how can you accomplish that with your smartphone? Fortunately, the iPhone has an exposure tool built into the camera. Typically, a camera reads the entire scene and automatically exposes the image based on that reading. Are you shooting outside on a sunny day? In that case, your iPhone may naturally want to underexpose the subject to keep the majority of the scene properly exposed. To remedy this, you simply tap and hold your finger down directly over your subject. Once you see the yellow box over your subject and the words AE/AF LOCK pop up, you are ready to manually adjust your exposure. Next to the yellow box, you should see what looks like a sun. Simply slide your finger up to brighten the subject or down to darken it. Voila!
Composition of Photos
There are tons of possibilities when it comes to composing a photograph. Composition, simply put, is the way elements are arranged in a photograph. A central principle in photography is called the rule of thirds. Perhaps you have heard the term before, but maybe you are unsure how to utilize it. Essentially, to use the rule of thirds, you would visualize your image cut into thirds both vertically and horizontally (much like a tic-tac-toe board), and you would place your subject where those lines intersect. The iPhone makes it simple to compose photographs following the rule of thirds. To enable a visual grid when you are taking pictures, simply go to Settings > Camera > Grid. Now, when you access your iPhone camera to take photos, you have the added assistance of knowing exactly where to place your subject. (This works on any of the built in aspect ratios – 1:1, 4:3, and 16:9.)
While the rule of thirds is foundational to good photography, it’s most definitely not the only way to shoot a beautiful, compelling image. Subjects placed directly in the center of the frame can make a big impact if done properly! In this case, simpler is better. Place your subject against a background that allows it to take center stage (literally and figuratively). Avoid busy, overdone backgrounds, and utilize negative space to avoid distraction.
Finally, when shooting multiple subjects in the same frame, employ the rule of odds. The rule of odds is defined by the belief that an odd number of subjects is more visually and compositionally appealing than an even number of subjects. Perhaps your company sells dinnerware, and you want to showcase a table setting on your Instagram account. According to the rule of odds, it would be more visually engaging to have three place settings as opposed to four.
Photo Backgrounds
Backgrounds play a vital role in the impact a photograph makes. Even with the best of intentions, background details are often overlooked. An activewear company may have sourced a fitting outdoor location to showcase their products in a lifestyle setting. However, the details in the background must not go unnoticed. Is there a tree branch extending out of the model’s head? Is there a car in the distance catching and reflecting light that draws the eye away from the subject? Is your own shadow reflected into the frame? Best practices are to scan the scene surrounding your subject to determine if there is anything that would compete with your subject. Adjust the position of yourself or the subject to remove distractions and keep the focus where it belongs.
Bonus iPhone Photography Tip: Portrait Mode
Professional photographs are often recognized and set apart from amateur photographs based on background blur. Background blur is the result of a number of variables such as aperture, lens length, and the distance between the photographer and the subject… all contributing to the shallow depth of field. This is getting a little technical, we know!
All of that to say, essentially, it is a bit more difficult to create a shallow depth of field or background blur using an iPhone. However, using Portrait Mode on your iPhone simulates background blur using edge detection. Unfortunately, Portrait Mode is not usable in every situation. To be able to use Portrait Mode, you have to be the perfect distance from your subject, and this is not always feasible. Additionally, we suggest paying extra attention to the output to make sure the result looks natural.
The good news is that you can still utilize your manual exposure technique and your rule of thirds grid in Portrait Mode. Using Portrait Mode can elevate your images, but an extra level of attention to detail must be maintained.
Post Processing Photographs
While it’s preferable to get as much right straight out of the camera, sometimes you may need to do a little adjusting after the image is already snapped. In this case, there are an abundance of free apps to handle your post processing. One of our favorites is Snapseed. This free app is extremely robust and allows you to adjust the brightness, contrast, saturation, ambiance, highlights, shadows, and warmth of your images after you’ve taken them.
And, that’s only a small scratch of the surface. Is your composition throwing you off, and you wish you’d set up the frame differently? Perhaps your whites have a yellow tint from your natural light source. Snapseed offers a crop tool with both preset sizes and custom sizes, as well as a rotation tool if your horizon is slightly crooked. Use the white balance tool to pull those color casts out of your image. If you find that your images don’t quite meet your standards even after following our iPhone photography tips and tricks, we suggest you give Snapseed a try.
Before and After Our Photography Tips
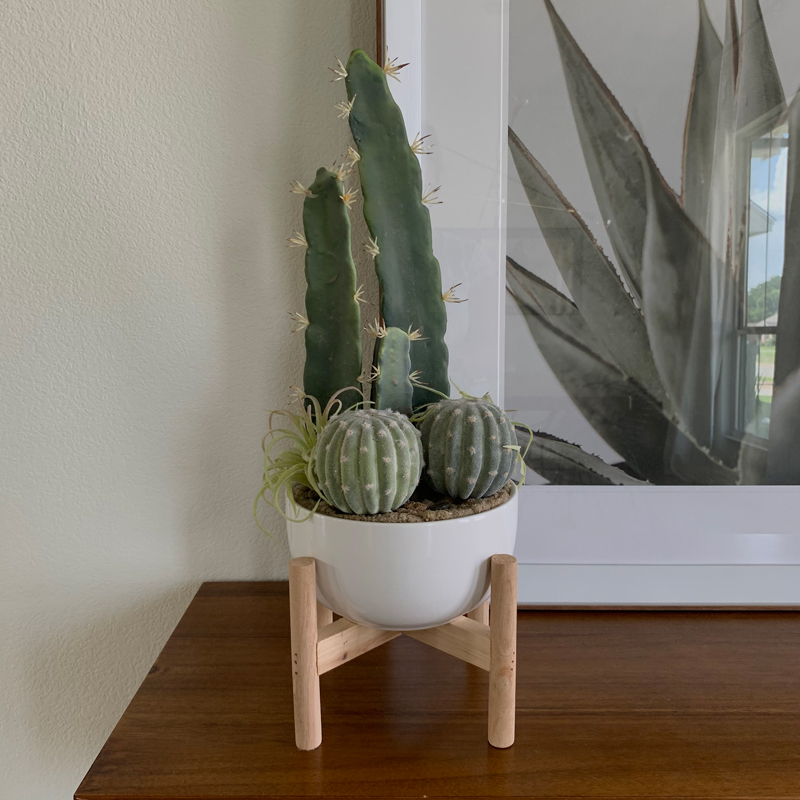
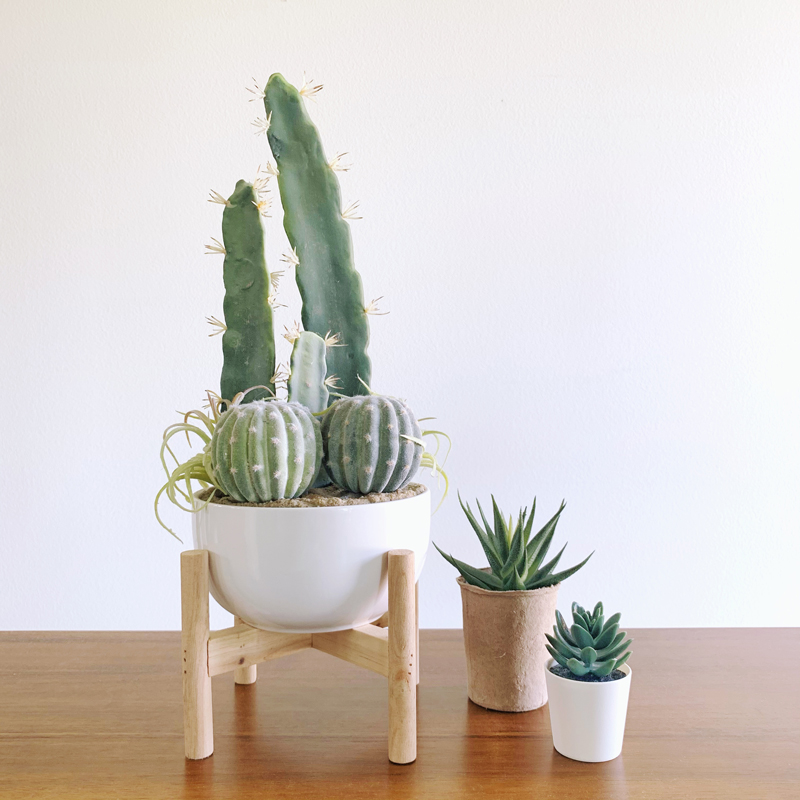
This is the area I was working in. Both images were shot with my iPhone XS.
In this before picture, I literally just placed the product on the table and snapped a photo. This is the quintessential “point and shoot.” Here is a sampling of the things wrong with this image:
In the after picture, I implemented the following tips:
With a little bit of effort and attention to detail, you can use your phone, a free app, and the lighting you have available to you to create lovely, engaging images.
Practice your Photography Basics
Here at Root & Roam, we know that you’ve built your business based on your expertise in your field. We understand that becoming a professional photographer may not be in the cards for you or any of your team members. However, that doesn’t mean you can’t have a beautiful, engaging, and converting Instagram feed! With a little practice and by using the iPhone photography tips above, you can capture and share images that stop your audience in their tracks.
If you’re ready to elevate your Instagram feed (or any medium where photography is used), but you just don’t want to do it on your own, contact us! We have a team of professional photographers on staff with a wide variety of specialties and extensive experience in taking businesses to the next level visually.


