
by Daron | Oct 4, 2022 | Website
Wireframing your project can be helpful to your team. What may feel like an extra step will help in the long run to communicate purpose, placement, and action. TABLE OF CONTENTS $ What is wireframing? $ How to make a wireframe? $ How to read a wireframe $ Key...

by Daron | Aug 29, 2022 | Creative Services, Website
TABLE OF CONTENTS $ What is ADA compliance, and why does it matter? $ How do I make my website ADA compliant? What is ADA compliance, and why does it matter? The Americans with Disabilities Act (ADA) is the United States’ most important law regarding accessibility and...

by AmyC | Nov 24, 2021 | Analytics Reporting, Root & Roam Blog, Website
Selling on Shopify – As the world is ever-changing, more and more people are doing their shopping online. From basic necessities to clothing and groceries, just about everything is available for purchase through the World Wide Web. Perhaps you have a brick and...
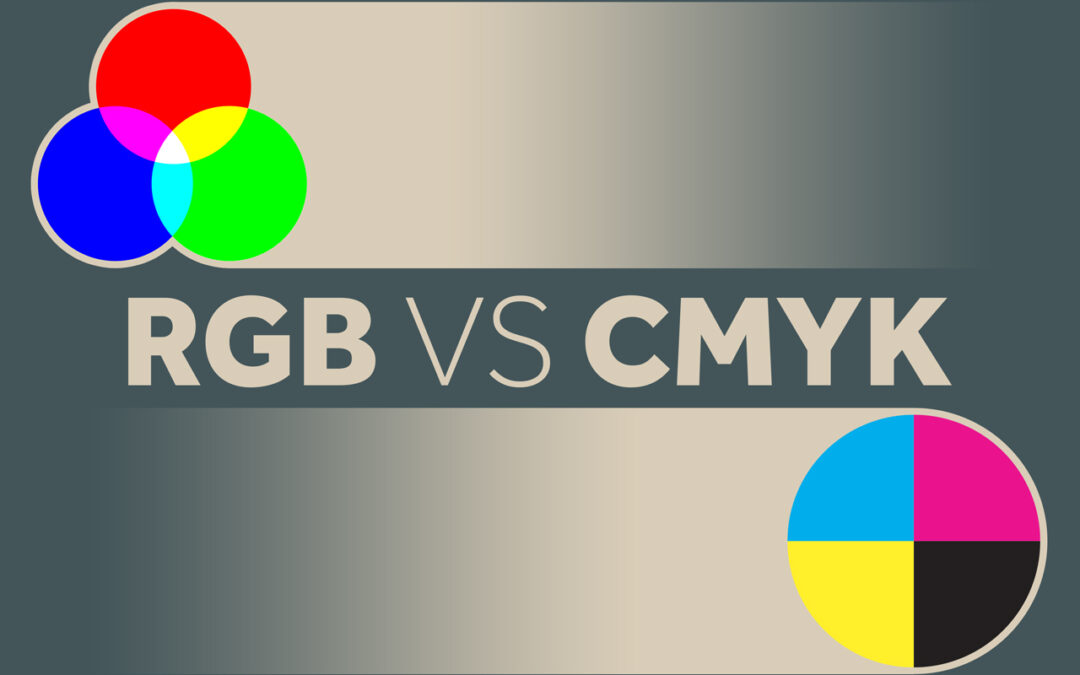
by AmyC | Aug 20, 2021 | Branding, Creative Services, Digital Marketing, EDDM, Graphic Design, Root & Roam Blog, Website
RGB vs CMYK – What is the difference between RGB and CMYK? Simply put, it’s just different ways of processing colors. Painters mix paint to make the perfect color palette. Digital designers also mix colors to create palettes, photography, and more. CMYK is the...

by AmyC | Jun 29, 2021 | Analytics Reporting, Audit, Creative Services, Digital Advertising, Digital Marketing, Local SEO, SEO, SEO Strategy, Social Media, Traditional SEO, Website
It’s hard to believe at times, but the internet has rules. There are protocols and conventions that, when followed, tend to make things easier on all of us. They also make the content we create more accessible to more people! One of the foremost jobs of a digital...

by AmyC | Jun 28, 2021 | Creative Services, Digital Marketing, Graphic Design, Root & Roam Blog, SEO, Social Media, Website
As of 2021, 1.074 billion people are on Instagram worldwide making it the perfect place to sell your products. Instagram has all of the tools you need to get your product in front of the consumer and make them remember it. Selling on Instagram takes hard work,...