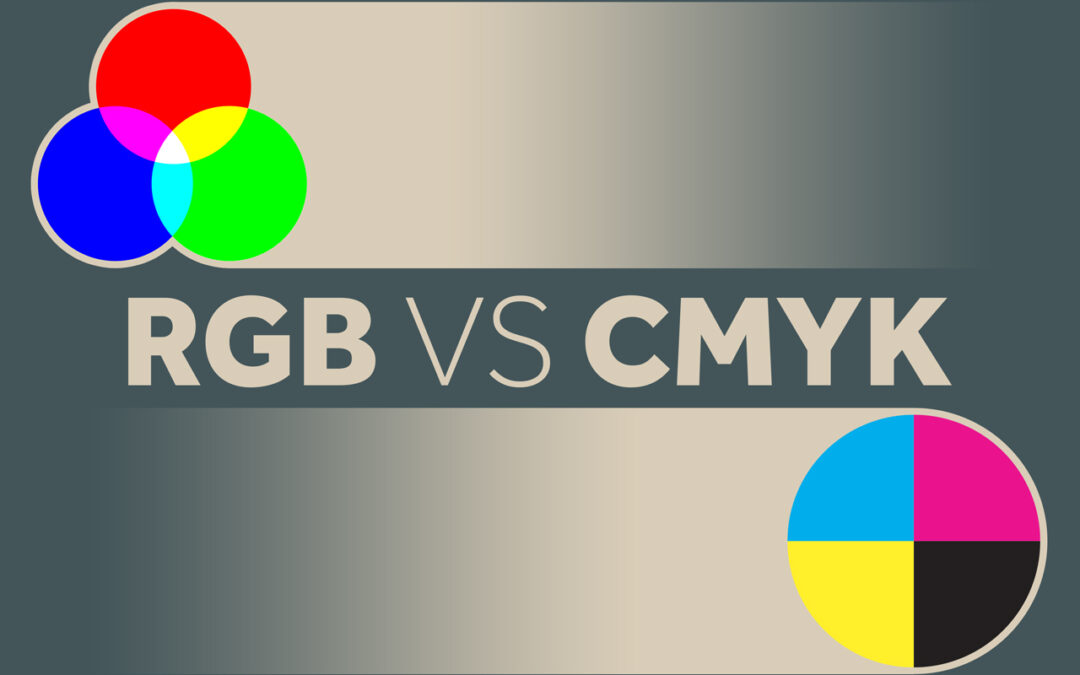
RGB vs CMYK : What is the difference?

RGB vs CMYK : What is the difference?

RGB vs CMYK – What is the difference between RGB and CMYK? Simply put, it’s just different ways of processing colors. Painters mix paint to make the perfect color palette. Digital designers also mix colors to create palettes, photography, and more. CMYK is the process of mixing 4 basic colors, Cyan, Magenta, Yellow, and Black, to make thousands of colors and realistic images in the printing process. RGB is the process of mixing three basic colors along with light, Red, Green, and Blue. The RGB color process was invented in the digital process when we started using televisions, computers, and retina displays.

RGB is an additive color model that uses Red, Green, Blue, and light for screens and monitors. CMYK is a subtractive color model used for printing made of four colors: Cyan, Magenta, Yellow, and Black. Black is the key color that provides the detail. That is where we get the K in CMYK.

Check out this graphic from our friends at Visual Pro:

rgb vs cmyk

The RGB process has made a huge splash in the design world now that we have retina displays at our fingertips that can interpret millions of colors. The technology is changing so quickly, but it is important to know the basic concept and why.

The timeline of RGB actually dates back before the electronic age and has roots in photography. But it made its debut with desktop computers in the 70’s displaying an amazing palette of 16 colors. RGB made its next splash with 24-bit monitors and then again with HTML with its 24bit color palette. Now our monitors and phones can interpret millions of colors with RGB.

What is RGB?

RGB is an acronym for Red Green Blue. Based on these three colors plus light, you can create a spectrum of colors. This color combination plus millions of tiny lights allows us to see images on digital items, such as televisions, projection systems, computers, and cell phones. RGB has advanced so rapidly with displays that we can now see millions of colors, just by applying a combination of Red, Green, and Blue.

Why should you care? Using the wrong color settings can cause your print projects to come out too dark or your website images to appear muddy and non-vibrant. RGB and CMYK are settings in most design programs that interpret the colors for us. Designers build graphics based on the end product and adjust settings to make your project perfect. If your end goal is digital, keep it RGB, but if you are looking to get something printed, you may want to change your mode to CMYK.

What is CMYK?

CMYK is a combination of 4 transparent colors; (c)yan, (m)agenta, (y)ellow, and blac(k). The K stands for “Key” – This is always black ink and helps finalize the details. This process is actually pretty awesome, and if you ever get to go to a printing press that uses CMYK plates, it’s an interesting process to watch. The printing press makes 4 plates (Cyan, Magenta, Yellow, and Black). Ink is then applied to each plate and paper runs through the press perfectly lining up to make a final image.

Check out this graphic from Printing Solutions:

cmyk or rgb for print

It doesn’t feel possible that combining those four colors would produce such a vivid image of color, but it does. Magic… science… same thing.

We use CMYK for the printing process. This is how the ink is distributed on our inkjet home printers and our large 4 color press printers. Same theory.

If the final destination of your graphic is not printed, this setting can make your color look a little muddy or not as vibrant. If it is really important that the color is exact for you, you will want to have a designer with a calibrated monitor help or do some test prints from the printer.

Hex Codes and Web Safe Color

Since not all monitors are the same, designing for the web can be tricky. Even if I use my RGB settings, things can differ based on the display type. Monitors and displays are constantly advancing also, but Hex codes are a way to keep your colors as consistent as possible. A hex code is a code of 6 letters and numbers that basically tell the monitor how to interpret the RGB color. Choosing web safe colors is still best practice to have consistency across displays, but this rule seems to have less value lately as most of the population have modern displays.

This is a good reference for web safe hex values.

One thing to note – make sure the numbers or letters are the same in each segment. This formula ensures that the color is going to be web safe. Like #CCFF00 is web safe because the numbers match up, while #CF01RR will not be as consistent across all displays.

Hex Codes still interpret color in an additive RGB format; it is simply the code telling the website how much color to display.

Color Blindness on the Web

Because not every person sees things the same, we have to make sure content is still visible for our color blind friends and coworkers. Making sure your background and type have enough contrast is a good rule of thumb. Also, making sure that you don’t use certain colors on top of each other like red and green. Color combos and fancy backgrounds can be fun, but don’t forget websites are still a tool to deliver information. Check out this really cool tool that will help you make sure your site is color friendly.

The difference between RGB and CMYK

Here are the main things to keep in mind as you prepare graphics for output. CMYK setting is for print and is made of four colors in a subtractive color model like paint. RGB is a setting that uses light and an additive color model to make vibrant colors on our digital displays.

Thanks for stopping by. The team at Root & Roam know some things about color, so if you are having trouble on a project, let Root & Roam help!

iPhone Professional Photography 101

iPhone Professional Photography 101

iPhone Professional Photography 101 – Instagram is a wildly popular social media platform. Based on its active monthly users, we’re willing to bet you are familiar with it and most likely an active user yourself. With over 1 billion active users monthly (130 million of those in the United States alone), Instagram has a worldwide reach. As a business owner, there is a high probability that your target market is already on Instagram.

So, how do you get your audience to stop the scroll on your content? The answer is simple in theory. You must stand out in the overload of visual stimulation. The execution is a little trickier. Today we’re going to focus on making your still photography stand out.

Photography Tips 101

We get it. You’re running a business. You’re likely pulled in a million different directions as it is. Who has time to become an expert in photography? And, not to mention, professional photography gear is expensive. Thankfully, these days, smartphone technology has come a long way. With a little practice, you have everything you need to create visually stunning images right in the palm of your hand. Let’s take a look at a handful of best photography practices and how to accomplish them using your iPhone.

Lighting for Photography

Depending on your brand’s aesthetic, it’s imperative to choose the proper lighting source. We can guarantee that source is almost never your iPhone’s built-in flash. There are a few reasons we hold steadfast to this belief. First, your iPhone’s flash is simply not strong enough to evenly light a scene. Second, the flash tends to cast harsh and distracting shadows. While shadows can be an artistic choice, you have almost no control over the built in flash of your iPhone. And, finally, the light from your iPhone’s flash is bounced back to you off of any reflective surface. Think: mirrors, windows, countertops, etc.

If you do not already own (and know how to use) professional lighting equipment, you can experiment with natural light sources. Did you know that shooting in a garage with the door wide open is touted as one of the easiest, most even natural light sources to work with? So long as the sun is not shining directly into the garage, you have a beautifully diffused light source free of charge! This principle can be carried over to other physical areas of your home or business. How about placing your subject in front of an open door where just the right amount of light shines in? Or, perhaps you have space to stage your scene in front of a large window. In any of these cases, the subject faces the light source, and you place yourself between them to shoot. Just watch out for any shadows you may be casting on the subject.

Photography Exposure

Great lighting leads directly into the topic of proper exposure. Exposure is everything! When photographing a subject, an image that is either over exposed or under exposed causes a loss of detail in the highlights or shadows respectively. In the case of product photography, it’s of the utmost importance to depict your goods as accurately as possible to avoid disgruntled customers and decrease returns.

So, how can you accomplish that with your smartphone? Fortunately, the iPhone has an exposure tool built into the camera. Typically, a camera reads the entire scene and automatically exposes the image based on that reading. Are you shooting outside on a sunny day? In that case, your iPhone may naturally want to underexpose the subject to keep the majority of the scene properly exposed. To remedy this, you simply tap and hold your finger down directly over your subject. Once you see the yellow box over your subject and the words AE/AF LOCK pop up, you are ready to manually adjust your exposure. Next to the yellow box, you should see what looks like a sun. Simply slide your finger up to brighten the subject or down to darken it. Voila!

Composition of Photos

There are tons of possibilities when it comes to composing a photograph. Composition, simply put, is the way elements are arranged in a photograph. A central principle in photography is called the rule of thirds. Perhaps you have heard the term before, but maybe you are unsure how to utilize it. Essentially, to use the rule of thirds, you would visualize your image cut into thirds both vertically and horizontally (much like a tic-tac-toe board), and you would place your subject where those lines intersect. The iPhone makes it simple to compose photographs following the rule of thirds. To enable a visual grid when you are taking pictures, simply go to Settings > Camera > Grid. Now, when you access your iPhone camera to take photos, you have the added assistance of knowing exactly where to place your subject. (This works on any of the built in aspect ratios – 1:1, 4:3, and 16:9.)

While the rule of thirds is foundational to good photography, it’s most definitely not the only way to shoot a beautiful, compelling image. Subjects placed directly in the center of the frame can make a big impact if done properly! In this case, simpler is better. Place your subject against a background that allows it to take center stage (literally and figuratively). Avoid busy, overdone backgrounds, and utilize negative space to avoid distraction.

Finally, when shooting multiple subjects in the same frame, employ the rule of odds. The rule of odds is defined by the belief that an odd number of subjects is more visually and compositionally appealing than an even number of subjects. Perhaps your company sells dinnerware, and you want to showcase a table setting on your Instagram account. According to the rule of odds, it would be more visually engaging to have three place settings as opposed to four.

Photo Backgrounds

Backgrounds play a vital role in the impact a photograph makes. Even with the best of intentions, background details are often overlooked. An activewear company may have sourced a fitting outdoor location to showcase their products in a lifestyle setting. However, the details in the background must not go unnoticed. Is there a tree branch extending out of the model’s head? Is there a car in the distance catching and reflecting light that draws the eye away from the subject? Is your own shadow reflected into the frame? Best practices are to scan the scene surrounding your subject to determine if there is anything that would compete with your subject. Adjust the position of yourself or the subject to remove distractions and keep the focus where it belongs.

Bonus iPhone Photography Tip: Portrait Mode

Professional photographs are often recognized and set apart from amateur photographs based on background blur. Background blur is the result of a number of variables such as aperture, lens length, and the distance between the photographer and the subject… all contributing to the shallow depth of field. This is getting a little technical, we know!

All of that to say, essentially, it is a bit more difficult to create a shallow depth of field or background blur using an iPhone. However, using Portrait Mode on your iPhone simulates background blur using edge detection. Unfortunately, Portrait Mode is not usable in every situation. To be able to use Portrait Mode, you have to be the perfect distance from your subject, and this is not always feasible. Additionally, we suggest paying extra attention to the output to make sure the result looks natural.

The good news is that you can still utilize your manual exposure technique and your rule of thirds grid in Portrait Mode. Using Portrait Mode can elevate your images, but an extra level of attention to detail must be maintained.

Post Processing Photographs

While it’s preferable to get as much right straight out of the camera, sometimes you may need to do a little adjusting after the image is already snapped. In this case, there are an abundance of free apps to handle your post processing. One of our favorites is Snapseed. This free app is extremely robust and allows you to adjust the brightness, contrast, saturation, ambiance, highlights, shadows, and warmth of your images after you’ve taken them.

And, that’s only a small scratch of the surface. Is your composition throwing you off, and you wish you’d set up the frame differently? Perhaps your whites have a yellow tint from your natural light source. Snapseed offers a crop tool with both preset sizes and custom sizes, as well as a rotation tool if your horizon is slightly crooked. Use the white balance tool to pull those color casts out of your image. If you find that your images don’t quite meet your standards even after following our iPhone photography tips and tricks, we suggest you give Snapseed a try.

Before and After Our Photography Tips

iPhone photograph

This is the area I was working in. Both images were shot with my iPhone XS.

iPhone photograph before and after

In this before picture, I literally just placed the product on the table and snapped a photo. This is the quintessential “point and shoot.” Here is a sampling of the things wrong with this image:

$
Lighting – the only lighting I’m using here is natural light, however, there is not enough of it.
$
Exposure – because there is not enough light, the image is underexposed.
$
Composition – The product is placed in the center of the frame, which is not always a bad thing. However, in this instance, it does not make for a very dynamic photo.
$
Background – The background in this image is particularly distracting. The framed print is reflecting the light coming through a window, as well as simply being too busy of a print to let the product shine. Additionally, the corner of the table draws the eye away from the focus.
iPhone photograph before and after

In the after picture, I implemented the following tips:

$
Lighting – I opened the double doors to the right of my scene to let in the beautiful, diffused, natural light.
$
Exposure – I used the iPhone’s built in exposure tool to brighten the overall exposure of the image prior to taking the photo.
$
Composition – I utilized the rule of thirds by placing the main focus of the image on the left line of the “tic-tac-toe” board. Additionally, I brought in two other, smaller products as accents that still allow the main product to take center stage. This is an example of the rule of odds.
$
Background – I removed the framed print from the image all together, and I repositioned the products in the center of the table so that the edge of the table would no longer draw the eye away from the product. Additionally, I pulled the table away from the wall in an effort to create a smoother, neutral background. (You’ll notice in the “before” picture that you can clearly see the texture of the wall. This is stylistic preference. I preferred less texture for this image.)
$
Post Processing – I used Snapseed to adjust the white balance, highlights, shadows, and contrast.

With a little bit of effort and attention to detail, you can use your phone, a free app, and the lighting you have available to you to create lovely, engaging images.

Practice your Photography Basics

Here at Root & Roam, we know that you’ve built your business based on your expertise in your field. We understand that becoming a professional photographer may not be in the cards for you or any of your team members. However, that doesn’t mean you can’t have a beautiful, engaging, and converting Instagram feed! With a little practice and by using the iPhone photography tips above, you can capture and share images that stop your audience in their tracks.

If you’re ready to elevate your Instagram feed (or any medium where photography is used), but you just don’t want to do it on your own, contact us! We have a team of professional photographers on staff with a wide variety of specialties and extensive experience in taking businesses to the next level visually.

How to Sell on Instagram: Everything you need to know about how to sell products on Instagram

How to Sell on Instagram: Everything you need to know about how to sell products on Instagram

As of 2021, 1.074 billion people are on Instagram worldwide making it the perfect place to sell your products. Instagram has all of the tools you need to get your product in front of the consumer and make them remember it. Selling on Instagram takes hard work, dedication, and marketing skills. This guide will show you how to sell on Instagram.

Set up an Instagram business account


To sell on Instagram, you will first need an Instagram business account. An Instagram business account will give you access to all of the great Instagram business features, including a “contact” button, analytics, sponsored posts, and Instagram shop. Follow these steps to create your Instagram business account:
$

Begin by creating a new account that does not contain any personal information.

$
Go to your Instagram page settings, click – Account
$
Click – Switch to Professional Account
$

Follow the steps and input the necessary information.

Voila! You are now ready to start selling on Instagram.

Build your Instagram shop


Once your Instagram business account is set up, you will need to set up your Instagram shop. To do this, you will also need a Facebook business page. Create your Facebook business page in two simple steps:

$
Connect your Instagram business account to your Facebook business page.
$
Log into Facebook, go to your ads manager, and find Commerce Manager in the hamburger menu. Follow the instructions to upload your catalog.

Your catalog can be uploaded three different ways:

- 1 -

You can bulk upload your items using an excel spreadsheet. You will need to create a spreadsheet and input the item name, description, and price. Then follow the instructions to upload your spreadsheet to your shop.

- 2 -

You can opt to manually input each item into your Instagram shop. If you choose this option, you will need to fill in the required blanks within the shop upload form to upload each item individually.

- 3 -

The third option is to integrate your instagram shop with your ecommerce website. To use this option, you will need to have already set up an ecommerce shop with any of the website platforms that Facebook integrates with. Your options are Shopify, Channeladvisor, Feedonomics, Admixt, Quipt, Woo Commerce, Bigcommerce, CommerceHub, CED Commerce, Data Caciques, and Zentail. The integrate option will automatically pull the inventory listed on your ecommerce website into your Facebook and Instagram catalog.

Once you have created your catalog, you will then need to set up the Instagram shop. Click the shops icon on the left hand side of your mobile screen. Follow the instructions to create the shop. You will be able to organize your Instagram product into categories, choose your shop colors, button styles, and fonts. When you are satisfied with your setup click – save, and publish. 

It may take some time for Facebook and Instagram to process your shop for approval. Keep the platform’s bylaws and rules in mind when adding products to your catalog. Once your shop has been approved, your customers will be able to shop directly from your Instagram business account.

Reach your Target Audience and Gain Shop Awareness


Reaching your audience is more than just posting content. Take the time to develop a strategy that shares content that grabs your target Instagram audience’s attention, and pair it with keywords, hashtags, and timing.

Strategically build your Instagram shop awareness and audience with Instagram’s paid and unpaid advertising options. Take advantage of various posting methods such as posting, stories, reels, IGTV, post promoting, and Instagram paid ads to get the word out about your Instagram shop. Devise a strategy for what methods you will use and how you will measure success. Continually adjust your strategy as you find what works best. 

Reaching your audience is more than just posting content. Content that grabs the views paired with keywords, hashtags, and timing are what makes a perfect post.

Timing is Everything


Instagram’s algorithm is designed to show the most recent posts at the top of the news feed. The Instagram insights feature shows you the time and days when your audience is most active. Post your content during the most active time for a better chance of getting in front of a larger amount of your audience and bringing in new followers.

Optimize your Instagram post with keywords


Optimize your Instagram shopping posts using keywords just as you would optimize your website. Keywords are also necessary for your Instagram post to be discovered in a Google search. Research keywords relevant to your niche and use them to strategically plan your next post.

Hashtag it


Hashtagging is not just a trendy activity. It could mean the difference between reaching additional audiences who would not discover your business otherwise. When you add a hashtag to your post, your post will appear in that hashtag’s feed. This means that anyone who follows the hashtag has the potential to see your post. 

There is quite a bit that can go into your hashtag strategy. A few dos and don’ts when using hashtags in Instagram:

$

Use just a few relevant hashtags in each post that you upload to Instagram, regardless if your post is in your Instagram feed, a story, or a reel.

$

Make sure the correct audience finds your posts by ensuring that the hashtags mean what you intend.

$

Pay attention to the amount of posts within a hashtag. When you search a hashtag on Instagram, you will see the number of posts with that hashtag. If there are a large number of posts, the likelihood that your post will be seen decreases. Instagram’s algorithm currently shows the most recent content first. When many posts are being added to a feed quickly, your post will get rotated down quicker. If you are just starting or are a small business, we recommend using smaller hashtags.

$

Do not use hashtags that are irrelevant to your post, products, or services.

Create a shoppable Instagram feed


Build a shoppable Instagram feed by tagging your catalog products in your posts. When consumers tap the image, they will be able to follow the tag directly to that product in your Instagram shop and purchase within Instagram. Creating a shoppable post only takes a few simple steps:

$

Create a new post

$

Choose your image

$

Tap Products – find the product in your shop catalog and tag it. If there are multiple products in one photo, be careful to place the tags in the correct place to avoid confusion.

Creating a shoppable Instagram story is similar:

$

Create a new story

$

Choose your image

$

Under links, choose – product

$

Search and tag the product in the story

Use this method every time you post product photos, and you will have created a completely shoppable Instagram feed.

Let’s sell product on Instagram!


To achieve the results that you desire, everything you do with your Instagram business page and Instagram shop should be strategically planned. Remember to always develop a strategy prior to starting any social media project. Keep your goals in mind and plan your actions accordingly. Selling on Instagram is the way of the future.

Here at Root & Roam, we understand that even with all of the tools available, selling on Instagram can be time-consuming and quite overwhelming. If you have any questions on how to sell on Instagram, we are here to help. Contact us today for more information on our Social Media services. Let’s move your product on Instagram!

Bringing Brands and Communities Together!

Bringing Brands and Communities Together!

The agency and the brand


Here at Root and Roam, we’ve enjoyed almost a decade of supporting one of our favorite clients, Pederson’s Natural Farms. Pederson’s was the first to create a no-sugar bacon and make it available nationally. They’ve grown to 90 employees with dozens more protein products and they continue to grow steadily. From label design to national campaigns, we’ve showcased Pederson’s across numerous channels over the years. Moreover, we have helped them increase revenue along the way.

Recently, they approached us about getting involved on a national level. Although Pederson’s has long supported local farmers and communities near their headquarters in Hamilton, Texas, they became interested in taking that helping spirit and supporting broader needs. And boy were we excited to hear that!

Broadening that giving spirit


Pederson’s is passionate about providing some of the best meat on the market. It’s something they take extremely seriously. They were the first to make a no-sugar bacon available nationally.  Since then, they’ve continued creating no-sugar added, non GMO, no nitrite or nitrate, all natural and sometimes organic, no hormones or preservatives…meat (well, you get the point)! They sell great meat. Naturally, working in an industry that provides millions of meals to fellow Americans gets you thinking, and the question arose: “What happens to the people who can’t get natural, wholesome proteins?” That question led Pederson’s to consider doing more to help feed their fellow citizens.

That’s when Root and Roam introduced Pederson’s to Feeding America, the nation’s largest domestic hunger-relief organization. Feeding America works tirelessly to connect people with food and end hunger. And thus, a beautiful partnership was formed!

#PedersonsFeedsAmerica


On April 15, 2021, Pederson’s announced its partnership with Feeding America. Pederson’s pledges to provide 1.5 million meals* to communities through their own charitable donation and the donations of Pederson’s customers through the #PedersonsPrepRally campaign.

In conjunction with this partnership, Pederson’s launched a campaign called Pederson’s Prep Rally to bring diverse communities together to celebrate our differences through people’s shared passion for food. Four influencers from diverse backgrounds were identified to help share engaging content across social platforms all while raising awareness about Feeding America. Diversity is a big part of the Prep Rally strategy.  We want to bring different communities together to share their love of food and to support those who need our help in getting quality food. Donation buttons will be on all platforms and websites leveraging the campaign. Together with Root and Roam and all of the Prep Rally influencers, Pederson’s will play an active role in helping to provide meals to those with food insecurity.

The best part about this partnership is that people who donate literally provide meals in their respective zip codes! People can give back and help support their own local communities in need.

How you can help support Feeding America


Pederson’s has provided multiple ways that you can donate to those with food insecurities and help support the great work Feeding America does. Here are just a few ways:

Join the Rally Room! The Rally Room is a membership and subscription-based way to get quarterly SWAG, exclusive deals and meat bundles of Pederson’s delicious proteins. All while donating monthly to Feeding America. It’s part of your subscription! You can find out more about the Rally Room here. https://pedersonsfarms.com/pages/prep-rally

You can also go to www.pedersonsfarms.com and donate right on the homepage! No purchase necessary.

You can also check out Pederson’s social media channels – Facebook and Instagram – weekly to find out other ways you can give to Feeding America. We’ve got you covered there!

And finally, to everyone who participates, we thank you from the bottom of our hearts! Let’s help feed America!

*$1 helps provide at least 10 meals secured by Feeding America® on behalf of local member food banks. Meal claim valid as of 7/1/20 and subject to change.